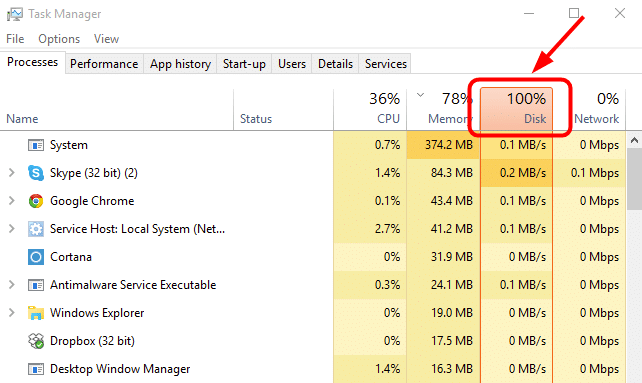
If you have no idea what Super Host SuperFetch is, don't worry. We will not only explain what the program is but also how you can disable it when it takes up too much disk space on your computer. Sometimes Task Manager may show that the service host SuperFetch system is using a massive quantity of CPU and memory. The SuperFetch system occupying 100% of disk or CPU space is a common error. However, this application is built into the Windows system so you may not even know you have the program until it is already causing issues.
What is Service Host SuperFetch
This system helps the Windows operating procedure to effectively manage memory so that critical Windows programs and third-party applications in your system can function successfully with no lag time for common tasks.
This Windows system performs multiple tasks in the background. The program helps research system specified usages like RAM and CPU. SuperFetch helps to optimize the system to improve overall speed. However, the Service Host Superfetch error commonly occurs on Windows 10 systems.
Also, Read How to Block a Website on Chrome
Benefits of Service Host SuperFetch
- Helps to decrease boot time.
- Quickly and efficiently loads common applications.
- Learns your usage behaviors to optimize storage.
Why is Service Host SuperFetch using excessive disk space?
Service Host Superfetch high disk space usage is caused because the system doesn’t have the latest hardware installed. Superfetch high disk utilization is hardly ever a dangerous signal. It appears because the service makes your computer use its maximum potential to respond to input and output requests quickly.
However, if you discover that Service Host Superfetch is using up all of your disk space, you may want to disable it. Disabling this program will not have any side effects on you computer systems functionality.
If you want to disable SuperFetch, you can follow the methods below.
Methods of Disabling Service Host SuperFetch
1. Disable Service Host SuperFetch with Run Command
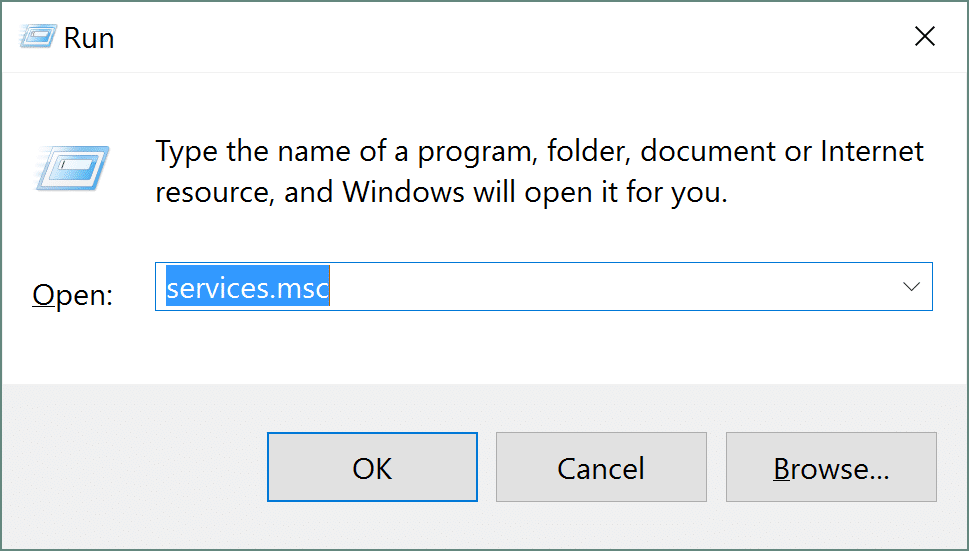
- Press the Windows key + R key to open the Run dialogue box. Or you can click on start in Windows and type 'run' to find the Run command.
- Type 'services.msc' and press Enter to bring up the Services window.
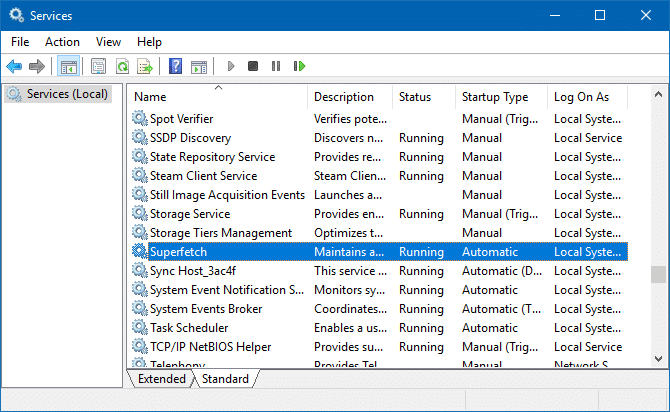
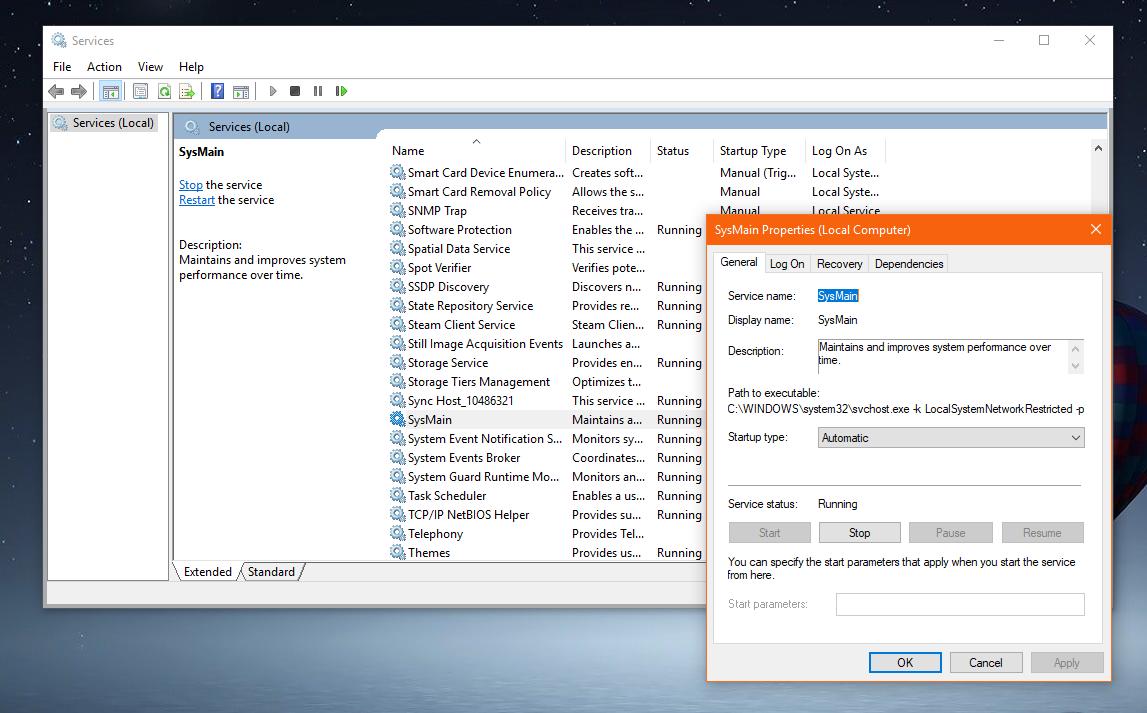
- Once you see the list of Services, find Superfetch.
- Right-click on this service and select properties.
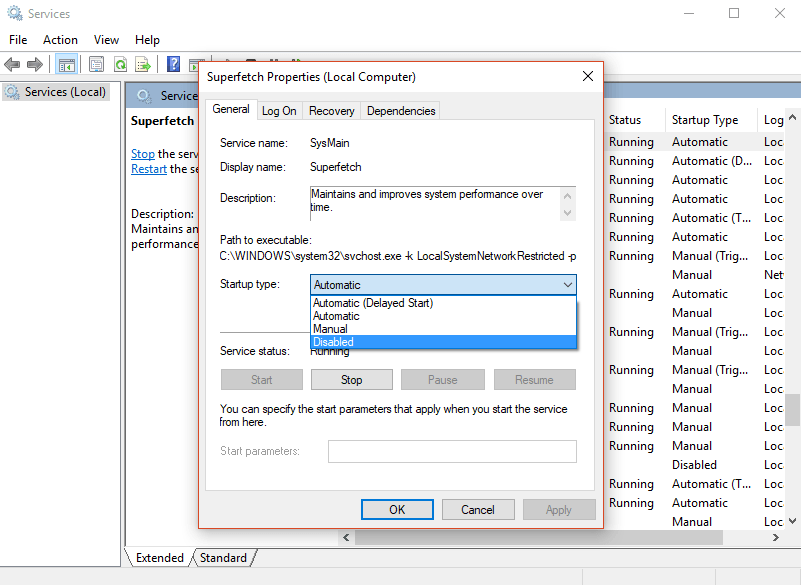
- Once the window of the properties pops up, click on discontinue.
- From the startup type drop-down menu select Disabled.
2. Disable Service SuperFetch using Windows Registry
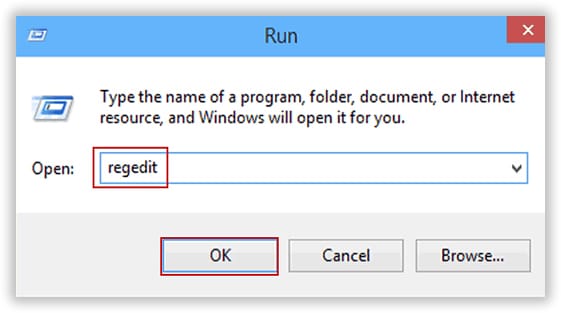
- First, you will need to press the Windows Key + R key, and then the Run command will open.
- Type "Regedit" and click OK.
- You will need to search for and click on HKEY_LOCAL_MACHINE folder.
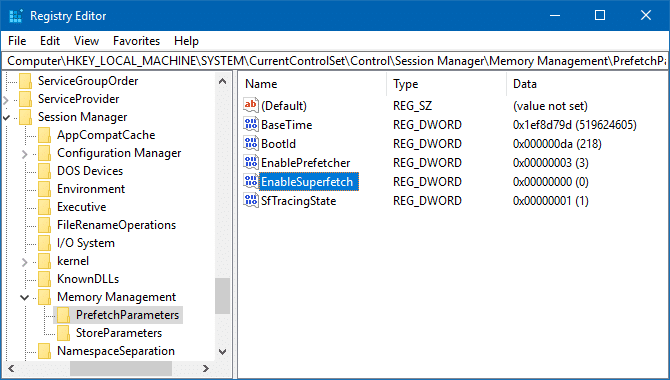
- Now Navigate to SYSTEM > CurrentControlSet > Control > Session Manager > MemoryManagement > PrefetchParameters.
- Now select on New > DWORD Value.
- Right-click on it and select Modify.
- Change its value to zero to disable SuperFetch and click Ok.
Also, Read How to recover unsaved word document
3. Stop SuperFetch Manually
- First, search for Command Prompt, right-click on it
- Click "Run as administrator" then click "Yes" to continue.
- Type, "net.exe stop Superfetch".
- Press the Enter key on your keyboard.
- If you need, you run a disk check by typing the following command: chkdsk.Exe/f/r
- Then, press the Enter key on your keyboard.
4. Permanently disable Windows Search
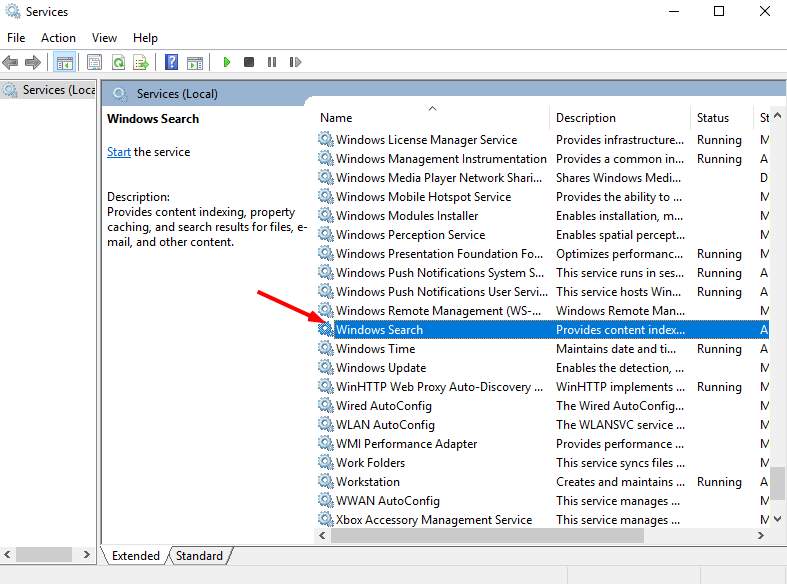
- Press the Windows key + R key and type in "offerings.MSC."
- Locate the Windows Search option, double click it to enter its Properties window.
- Change the Startup type to Disabled.
- Now click Apply and OK to save your change.
- Check your computer’s disk usage by typing “task manager” into the Windows search bar and then selecting Task Manager.
We hope you understood the above methods to disable Service Host SuperFetch and that this guide was useful for you! If you have any questions, let us know in the comment box. Share this guide with your friends, family and coworkers!
Last updated on November 20th, 2022 at 02:15 pm


